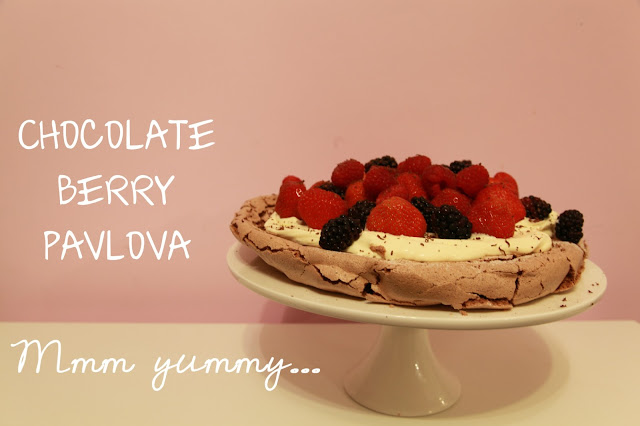
Chocolate Pavlova and Top Baking Tips
From time to time we get to introduce some excellent guest bloggers and interesting people we meet through the Duck Egg Designs Community.
Our first guest Blogger of 2013 is Becky of "Becky Bakeswells". We met the wonderful Becky through our twitter community (35,000 followers - Twitter: @duck_egg) where her friendly helpful advice and super tips have helped us on a number of baking occasions... and we have a few!
Becky is planning on launching her bakery soon and we thought it would be great to introduce you to her and some of her delicious recipes!
We thought we'd start with Becky's Top Tips before we fly into one of her delicious cakes.

Becky BakesWell's
Top Baking Tips
1) If
you’re up against the clock when baking, put fridge cold eggs into a bowl of
warm water for five minutes to take the chill off them – room temperature eggs
will whip up more easily and produce better quality results.

2) When
trying out a new cupcake recipe it’s wise to bake one ‘test’ cupcake before
filling the rest of the cases. This test cupcake will enable you to check oven
temperatures, timings and will influence how far you fill the cake cases - some
mixtures will rise dramatically in the oven and others can be more modest.
3) Cakes
not rising as they should be? Check the date on your baking powder and
bicarbonate of soda – the shelf life of these raising agents is surprisingly
short and using fading raising agents can lead to disappointing results. You
can put left-over bicarbonate of soda to good use as a thrifty fridge freshener
though – put an open container of it in the fridge to absorb strong smells.
4) When
whisking up egg whites, wipe the inside of the bowl and whisk/electric mixer
beaters with a lemon wedge to remove any traces of grease that could prevent
your egg whites from whipping up properly.
5) Before
storing flour in your cupboard, pop the pack of flour in a sandwich bag to
protect the packaging and freeze it for 48 hours to safeguard against flour
mites. Always store flour in a plastic container with a tight fitting
lid.
AND NOW FOR THE MAIN EVENT:
Chocolate Berry
Pavlova
This crisp yet marshmallowy
meringue base is studded with chunks of chocolate, blanketed with a cool,
smooth layer of cream and is then scattered with berries. This dessert is so
useful - the meringue base can be made in advance, the fruits can be tweaked to
suit the season and it’s perfect for serving at parties as it’s light, and
handily gluten-free.
Serves: 8-10
Chocolate Meringue Base
300g caster sugar
6 egg whites
3 tablespoons cocoa powder sieved
50g dark chocolate, chopped into
small chunks
1 teaspoon balsamic vinegar or
white wine vinegar
Topping
500ml double cream
500g mixed berries
Finely grated dark chocolate or
sieved icing sugar to decorate
Method
1) Preheat the oven to
180 degrees Centigrade/350 degrees Fahrenheit/gas mark 4. Using a pencil, draw
a 23cm diameter circle on a piece of baking parchment, turn it over and place
this on a wide baking tray.
2) Using an electric
whisk or the whisk attachment of a food mixer, whip up the egg whites until
they form soft peaks of tight, compact bubbles. Whisk in the sugar one spoonful
at a time until the meringue is stiff and glossy.
3) Gently fold in the
sifted cocoa, the vinegar and the chocolate chunks until everything is
completely combined. Be careful at this point – you want
everything to be mixed together properly, but you don’t want to bash all the
air out the mix that you have just carefully created.
4) ‘Glue’ the baking
paper to the baking tray with a dot of meringue mixture on each corner of the
paper. Dollop the meringue mixture into the centre of the circle, then flatten
and spread outwards to cover the circle shape. You want to create a thick
circle with a flattened top and straight upright edge – you don’t want
the side surfaces to be shallow and collapsed.
5) Place in the oven
and turn the oven down to 150 degrees Centigrade/300 degrees Fahrenheit/
gas mark 2. Bake for 60-75 minutes. When it’s ready, the meringue should look
like it has a crisp outer shell and it should be dry on top. However, when you
press the centre, it should feel marshmallowy.
6) Now, here’s the
trick
– turn the oven off and open the door slightly, leaving the pavlova base in the
oven to cool completely. This precaution helps to avoid the
meringue becoming deflated or damaged when you build the pavlova later and
helps it to remain crisp and chewy.
7) When you want to
serve the pavlova, invert the meringue base on to a serving plate or a cake
stand and peel off the baking paper. Whisk the cream until it just starts to
hold its shape and dollop it on to the base. Scatter your chosen berries over
the cream and then sprinkle over the grated chocolate or a slight dusting of
icing sugar.
For more info on Becky:
We will be back with a new blog soon but in the interim you can keep up to speed with our website: www.duckeggdesigns.com and our Facebook: www.facebook.com/duckeggdesigns
Do leave your comments and ideas as we love to hear from you all. Big thanks to Becky and enjoy baking!
Team Duck Egg.


No comments:
Post a Comment